Pages

10.28.2011

Halloween Tutorial: Spooky Half-Moon Nail Tutorial!


Hey guys! Halloween is right around the corner, so I thought it would be appropriate to do another halloween tutorial! Instead of makeup, I thought incorporating a nail tutorial would be appropriate. And I have to admit, I LOVE this nail tutorial! So keep reading for a spooky half-moon Halloween nail tutorial!!


Products Used!
Orly In A Snap Top Coat
Orly Bonder Base Coat
Orly "Tangerine" Nail Polish
Sally Hansen "Black Out" Xtreme Wear

Step 1: Paint your nails with a base coat. 

Step 2: Paint two coats of your orange polish. This will be the base before you add black so it doesn't have to be perfect! 

Step 3: Apply reinforcement labels on each finger AFTER your nails are dry! Make sure all the edges are firmly on for a clean edge. 


Step 4: Now put the black polish onto the rest of your nail. 


You are finished! Now you have traditional black and orange half moon nails! Enjoy!! If you liked this post please follow and comment below! Love you guys :)


10.23.2011

Review: Maybelline Falsies Mascara {Before/After Pictures and More!}

Hey readers! This post is a review of the latest mascara I have been using, Maybelline Falsies! I have the original formula in "Blackest Black." Keep reading for a detailed review and photos! 


Formula: I like the formula of this mascara! It is very thin so my eyelashes can be built up very well. Also, this mascara is very black which I love. The pigmentation is awesome. I am not as impressed as I thought I would be for this mascara though. I do not look like I am wearing false eyelashes. Also, it does not hold curl on its own and is not very volumizing. It is nice on lengthening my lashes but not the best I have seen. I like the formula, but I don't love it. There are better drugstore mascaras out there. 
Packaging: I love the color of the tube and the wand is unique. The wand is shaped like a "C" so there is a slight curve to fit to your lashes. The tube doesn't necessarily look expensive or high quality, but it isn't supposed to be. 
Longevity: Longevity of this mascara is AWESOME! It doesn't flake or wear off at all throughout the day. I am impressed with this aspect of it quite a bit! 

Before

After


More Pictures... 


10.22.2011

Skincare Series: Top 3 GENTLE Face Washes

Hi readers! This is the start of YET ANOTHER short series! I am going to be recommending face cleansers for each skin type! Today's post is my gentle face cleanser recommendations! The other two categories are flaky/dry skin and oily/acne prone skin. Be sure to stay tuned for those. The type of face cleansers featured today have a creamier and more luxurious formula. This post is for people who don't have sensitive skin because some of the choices have a perfume in them. I chose face washes that focused on creating a luxurious feeling more than improving the state of skin for this skin type. Hope you enjoy!

Option #1Borghese Crema Saponetta Cleansing Creme 

Net Weight: 6.7 OZ
Company: Borghese
Where to buy: Bloomingdales, Online
Price: $32.50

I love this cleanser! My mom has used it forever and swears by it! It is a creamy formula with the most relaxing scent ever. It clears my skin up pretty well and doesn't leave a residue. This isn't for heavy breakouts but awesome for people with slightly dry skin. I really love this!


Option #2
Cetaphil Gentle Skin Cleanser 
Net Weight: 16 FL OZ
Company: Cetaphil
Where to buy: CVS, Rite Aid, Walgreens
Price: $11.49

This is one of my favorites because of the price and huge quantity of product given. This is amazing to use as an everyday cleanser. It's very refreshing and has a creamy formula like most high-end face cleansers! 

Option #3
Chanel Mousse Douceur Foaming Cleanser
Net Weight: 5 FL OZ
Company: Chanel
Where to buy: Nordstrom's, Bloomingdales, Macy's 
Price: $45


I currently use this. Even though it has the smallest weight and highest price, this cleanser still is awesome. I only need a pea size amount of product to lather up my whole face! This feels the most luxurious and creamy on my face and has lasted me almost a year and a half. It is nice and refreshing but still has a comfy feel. I love using this before I go to bed. 


10.19.2011

Review: NYX Super Skinny Eye Marker {Photos and Swatches}


Hey guys! This is a review of my current favorite liquid liner, the NYX Super Skinny Eye Marker! I have been using this everyday for the past couple of months and it is still going strong! I hope this review helps. Keep reading for a detailed review with photos and swatches. :)

NYX Super Skinny Eye Marker

Net Weight: 1 OZ
Company: NYX Cosmetics
Where to buy: ULTA, Local Beauty Supplies
Price: $8.99


Formula: "Carbon Black" is an extremely smooth eyeliner that has a really intense pigmentation. It applies quite smoothly and is not too slippery. It takes a few coats to get the best results. The finish is slightly shiny like most liquid liners which I do not like, but I set my eye liner with black eyeshadow anyways.
Packaging: The packaging is my favorite part of this product! It has a precise felt tip which allows for very thin lines. The ease of use for this product is amazing. I used gel liner for the longest time and loved it, but the application of it is time consuming. Because it is in "pen" form, there are no extra pieces.
Longevity: The longevity is average. If the eyeliner is not set, it will fade during the day. This is the only negative quality.


(sorry my hand was slightly shaky haha)

I hope you enjoyed this post and found it helpful! I really do love this eyeliner and would recommend it to anyone. The price is reasonable and the product is great! If you like this post, please follow and comment below! Thanks guys <3


10.17.2011

DIY: Homemade Vanilla Rose Lip Balm

Hey lovelies :) Today's post is a really fun and exciting one! This recipe is to make your own DIY Lip Balm! The ingredients are not common household ingredients, but are extremely easy to find at a local specialty market!!! I chose the flavor "vanilla rose" because of the feminine and floral scent. It is sweet and luxurious. Keep reading for an ingredients list and directions!


What You Need: 

  • 1 tablespoon beeswax pearls (also called pellets or pastilles)
  • 1 tablespoon pure shea butter
  • 2 tablespoons sweet almond oil
  • 10-15 drops essential oils
  • 4 tins 
  • 10 drops of Rose Oil
  • 5 drops of Vanilla Oil
Directions:
Melt the beeswax, shea butter, and almond oil together in the top of a double boiler or in a heat-safe bowl set over a pot of simmering water. Stir continuously with a whisk. Once the ingredients melt, remove them from heat. Whisk in the essential oils as well as the rose and vanilla oil. For the next step you have to work quickly! Transfer the liquid mixture to a measuring cup or a container with a pour spout and then divide it among four 1/2-ounce lip balm tins. Let balms cool completely until solid, about 20 minutes. Store in a cool, dry place. Good Luck!
Thank you so so much for reading! Please follow and comment below how the recipe worked out for you. Love you guys!

Recipe courtesy of http://www.wholeliving.com/article/diy-lip-balm

HAUL: Bath And Body Works Candle Frenzy!


This weekend, I made a trip down to Bath And Body Works  in search of some Fall/Winter scents! Luckily, they were having a large sale and I got some great deals! Their large three-wick candles were a 2 for $20 deal, and the mini candles were 3 for $5. I have been craving the smell of pumpkins, cranberries, and musk so I was thrilled when I saw that the whole store was full of these scents! Listed below will be what I purchased! I wish I got some soap along with it, but maybe next time :)


Thanks for reading! If you enjoyed this post please follow and comment below! What are your favorite scents for Fall/Winter? Love you guys!

10.16.2011

Naked Glitter {Current Nail Combination}

This week, I wanted to create a manicure with a contrasting duo. I used a cool nude and a pop of glitter polish which balanced out the manicure perfectly. I love the simplicity of this. The nude tones down the glitter, and they complement each other with their cool undertones. I used Essie's "Sand Tropez" and Sally Hansen's "Strobe Light." Love this!


If you guys enjoyed this post, please follow! Thank for reading!


10.14.2011

How To: Achieving A Cut Crease with Eyeshadow!

Hey everyone!! Today, I am going to give a demonstration on how to make a cut crease on your eye! Keep reading for pictures, instructions, and some info on how to achieve this defined look!


FAQ {Frequently Asked Questions!}
What is a cut crease?
A cut crease is when you create extremely defined eyes by running eyeshadow throughout your whole eye crease! It gives the allusion of extremely set and defined eyes!

How do I make a cut crease?
To create a cut crease effect with eyeshadow, you take a neutral or bright color and run it through your eye crease all the way to your inner corner. Normally you create a "V" shape on your outer corner and connect it to the crease color just like the pictures above! Not only do you have to use eyeshadow, but blended out gel eyeliner works well too! If you are looking for a natural look, using a light brown looks great. It can also be built up to an extremely dramatic eye look.

My Example
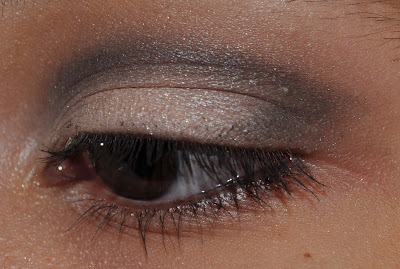
This is my version of creating a cut crease! I wanted to make it dramatic but wearable. I like the way it turned out!


Thank you so much for reading! If you enjoyed this post, please follow! :) Love you guys to death!

10.13.2011

Latest Love: NYX Round Case Lipsticks! {PART 2}

Hey beauties! This is the second part to my mini review of NYX Round Case lipsticks! I only have two shades but I have been loving the formula so much! Click here to go to my first post.

NYX Round Case Lipstick in "Tea Rose"

I have to admit, this is the lesser favorite of my two NYX lipsticks. But I am still extremely impressed with the formula. Literally, NYX lipsticks are the most pigmented lipsticks I own. This can tend to look a little chalky on a bad day, so using a gloss or extra chap stick makes a huge difference. I love the color, but not on my skin. I have a slightly yellow undertone with a tan, so it does not complement me. Nevertheless, this looks FABULOUS on my cooler-toned friends. I am still glad I purchased this lipstick, and will continue to wear it. Longevity is about an hour and a half. The finish is pretty matte with a slight sheen. I am continued to be impressed with this collection of lipsticks and cannot wait to buy more and review for you guys! <3


Thank you so much for reading and please follow!

10.12.2011

Halloween Tutorial: Mermaid !

 Mermaid Eyes! A Halloween Tutorial!


Hey guys! This is another halloween tutorial! I am not completely sure if I absolutely love this eye look, but I thought I would post it anyways. I focused on gold and bright blue eyes to resemble the ocean and the beautiful colors of a mermaid! Mermaids are "stereotyped" to have long blond hair and a aqua blue tail so I thought the color choice was appropriate. Keep reading for this tutorial information! If you guys hate it don't be mean... its not my best work lol...

Products Used:
  • Urban Decay's Primer Potion
  • Stila Eyeliner in "Koi"
  • NYX Jumbo Pencil in Electric Blue
  • Urban Decay "Buck and Half Baked" Eyeshadow
  • Mascara and False Lashes (i didn't use them but it will look so much better if you do!)
  • NYX Round Case Lipstick in "Tea Rose"
  • Bobbi Brown "Crystal" Lip Gloss
I hope this is self explanatory! Since I am not crazy about this look I will not go into full detail. Sorry my posts aren't amazing this week but I have been studying so much and dealing with the PSATS. Please follow though!


10.10.2011

I Want This!!! {Deborah Lippmann's "I Love The Nightlife" Nail Polish

Deborah Lippmann's "I Love The Nightlife" Nail Polish ($18)
Check out their website! Click HERE

SO PRETTY! I am dying over this nail polish! Deborah Lippmann's "I Love The Nightlife" is a charcoal graphite with pure shimmer and sparkle! I love the irredescence of this formula. Gray and charcoal neutrals have been the trend for this Fall and Winter nail polishes. I would not use this alone, but maybe over a navy, black, or gray nail polish. It kind of reminds me of Chanel's "Graphite" but with no green undertones and a little bit of a different texture. Nevertheless, I will definitely be keeping my eye out on this product. 

Thanks for reading guys and please follow!

10.06.2011

My October Wish List!

Hey readers! These are some beauty products that I have my eye on this month! Enjoy and if you have any thoughts on them, tell me below. I know that there are not that many things on my wish list this month! Weird, right!?

If you want to see my September Wish List, click here!


1. Soap And Glory's Hand Food
This hand cream looks amazing! I've heard it smells like Coco Mademoiselle from Chanel and is super moisturizing. Can't wait to get my hands on this!
2. Fairy Drops Scandal Queen Mascara
I have heard that this mascara holds curl like a charm! I still am hesitant to spend big money on mascaras though because I always go for drugstore ones! Nonetheless, this product definitely intrigues me and is on my wish list!
3. Maybelline Falsies Mascara
I cannot believe I haven't tried this yet! This mascara has been a cult favorite forever. Once I finish my Covergirl Lashblast Volume I am DEFINITELY buying this. 
4. Bare Escentuals bareMinerals READY Mineral Eyeshadow 4.0 in "The Dream Sequence"
I have always thought purple eyeshadows were beautiful but this palette is extra vibrant! I love the quality and overall brand so I hope I get a chance to own this product!

Thank you so much for reading and have an awesome day! If you liked this post please follow! Love you guys!


10.03.2011

What Do You Think? New Benefit Highlighter Launch!


Hey guys! Recently, Benefit came out with a new cream highlighter named "Watt's Up!". It is described as a "cream-to-powder highlighter that turns up the wattage with a delicate, gorgeous champagne glow. Its smooth application and luminous sheen switches on the "wow" factor for any complexion. Apply it to cheeks and brow bones, then sculpt with the soft-glow blender for your perfect gleam" (description courtesy of Sephora.com) I have not seen or tested it yet but this product interested me. The price is quite intimidating, a whopping $30 for a champagne cream stick! I wanted to hear YOUR opinions if you own this and give me your recommendation. I am interested to try this and will probably go to my local beauty counter and give it some time. I do like the concept and the color! Tell me your feedback! Thanks for reading and please follow!


10.02.2011

My Fall Essentials {Clothing}

Hey everyone! These are some fashion items I have been lusting for this fall! I really love how everything works together. These are based off my own perception on what is cute, not exactly following the trends lately. Anyways, enjoy! <3

1. Chunky Knit Taupe Scarves
Etsy, $24
2. Edgy Leather Ankle Boots
Steve Madden, $149
3. Sheer Neutral Button Downs
Equipment, $208
4. Statement Jewel-Tone Necklaces
Forever 21, $9.80

If you enjoyed this post, please follow! I love feedback as well :) Thanks for reading!